Thursday, December 20, 2012

Jeny's Stretchy Knit Cast On for Stump Covers

Snow is flying, wind is blowing. Sounding pretty ferocious out there...
20121220-230848.jpg
Time for a sock, or how about Barbara Coley's amputee sock!
20121220-231407.jpg

I'm using Indulgence Distrato Merino Wool, a soft, warm and easy care washable sock yarn in 013 white/grey colourway, size 6 US needles. With a generous 426 yards, there's enough for two pairs of socks/covers.
20121220-232204.jpg

What to use for a stretchy thigh band? Jeny's Stretchy Slipknot Cast-On, by Jeny Staiman:


20121220-232120.jpg


Let it snow, let it snow, let it snow.
20121220-230902.jpg

Saturday, December 1, 2012

Free 'n easy knit pattern, the Patricia cowl

I'm in full marathon knit mode now, aiming to get at least 4 projects completed before I head to Texas to help DD and SIL move back home, Jan 3. So far, I've made 2 pairs of slippers; one child and one adult size.
The adult size was a compilation of two patterns, the crochet top of the Crocodile Stitch Boots, and the knit foot and sole of the St Louis Boots - Slippers in seed st in Eskimo by DROPS design


20121201-091541.jpg
The childs' booties are done completely in crochet, according to the pattern. I'm not fond of crochet footwear, too holey and stiff, but will probably wear longer, at least one season, when she'll outgrow them. I used Red Heart Soft Multi worsted acrylic, for the child's booties.
20121201-091602.jpg
I'm going to make another pair of the St Louis Boots, once I have snagged some nice bulky worsted, color TBD.
I'm on to the next quick project, the Patricia Cowl.


20121201-091930.jpg
I'm using Berroco Voyage, Embers colorway, an interesting braided blend of yummy super fine Alpaca and polyester. The cable pattern is repeated over 20 rows, nothing too complicated, and is an easy pattern to memorize. This is the first two repeats.

Mr. Peeps is currently redecorating his cage; apparently the carpeting is very tasty!

20121201-092633.jpg

Sunday, November 25, 2012

Lesbo plug-in for....?

O this is just too funny to not share.
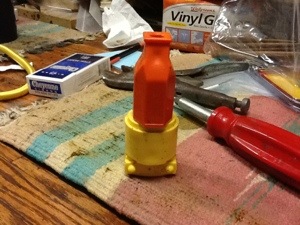
At Mr's request, I just spent the last 30 minutes attaching a replacement plug to an extension cord he wanted to salvage. I gave it a whirl, for snicks and grins. This is what happens when the blind lead the blind. "Like" and a thumbs up, if you get it ;)


20121125-152911.jpg

20121125-154432.jpg

Finally, the bulb comes on when Mr. finds the female connector and announces, "...looks like candy corn..."


20121125-153035.jpg
At least today, we had a laugh.

Thursday, November 1, 2012

Crochet Turkey Coasters And Ornaments | Free Pattern & Tutorial at CraftPassion.com

Crochet Turkey Coasters And Ornaments | Free Pattern & Tutorial at CraftPassion.com


14 Nov 21
Crochet Turkey Coasters And Ornaments

Crochet Pattern: Turkey Coasters And Ornaments

Pattern adapted from Jennifer Martin’s pattern in Ravelry after being inspired by 178/365 Flower Potholder.

Dimension:
Finished size: Approximate 6 1/2″ (W) x 5 1/2″ (H)
Gauge: not important as long as the yarn label said it is suitable for 2.5mm to 3.5mm hook.

Materials & Tools:
1. Yarn, acrylic baby yarn, 5 – 6 colors.
2. Crochet hook, 3mm
3. Felt – White, Black and Red
4. Sewing thread – White, Black and Red
5. Sewing needle
6. Scissors

Abbreviations:
sl knot = slip knot
st = stitch
slst = slip stitch (to fasten)
ch = chain
sc = single crochet
dc = double crochet
fo = fasten off
Rnd = round

Crochet Pattern:

Work on right side only, unless stated otherwise.
FRONT
Body
sl knot on hook to begin.
Rnd 1 – ch 4, 14dc into 1st ch, slst to the 4th ch at the beginning rnd. This will give you a total 15 sts in a rnd, counting the 3chs at the beginning rnd as the first 1 dc stitch. (15 sts)
Rnd 2 – ch 3, dc in same st, 2dc in each st around. slst to the 3rd ch at the beginning rnd. fo. (30 sts)
Rnd 3 – New color: ch3, *2dc in next st, dc in next st, repeat * around. slst to the 3rd ch at the beginning round. fo. (45 sts)
Rnd 4 – New color: ch1, sc around. fo. (45 sts)
Tail
Row 1 – New color: ch3, dc in same st, ch1, 2dc in same st, *skip 2 sts, (2dc, ch1, 2dc) in next st, repeat * until you have made 10 sets. fo.
Row 2 – New color: start at the ch1 space of previous row, ch3, dc in same space, ch1, 2dc in same space, *(2dc, ch1, 2dc) in next ch1 space, repeat * until you reach to the end. fo.
Row 3 – New color: start at the ch1 space of previous row, ch3, 2dc in same space, ch1, 3dc in same space, *(3dc, ch1, 3dc) in next ch1 space, repeat * until you reach to the end. fo.
Row 4 – New color: start at the ch1 space of previous row, ch3, 5dc in same space, *6dc in next ch1 space, repeat * until you reach to the end. fo.

BACK
Follow the front pattern with 1 color only.
When making the tail, you can either follow the front pattern by working on right side only, that is fo at every rnd and start at the first ch1 space of previous rnd.
Or,
Turn your piece to the other side to work without have to fo at each rnd. Make 2 to 3 slst at the beginning of each rnd to get to the ch1 space before beginning the first ch3 for the new rnd. Don’t fo and continue with the next step by joining the front and back pieces up.
Hook Loop: Make a loop at the middle of the tail with ch 10 and slst to the last sc.
Weave in all ends to neaten both front and back pieces.

Joining Front & Back
(Sew facial assemblies on the front before joining the front and back piece. Detail on sewing, please read further down.)

The tail outlining and detailing are made while joining both front and back pieces. All stitches must go through both pieces for joining up.

Place the front piece on top of the back piece, with wrong side facing each other. Line up edges.

Side edge of the tail: *1sc (at the corner to the tail and go through both layers), ch 1, repeat * until you reach the body.
Body & feet: sc in next 7 sts, [make foot: ch 2, *ch 2, sc on 2nd ch from hook, slst to 2nd next ch, repeat * 3 times, sc on next st, sc in the same st of last sc before making foot], sc in next 4 sts, repeat make foot, sc in next 6 sts.
Side edge of the tail: *ch 1, 1sc, repeat * until you reach the corner of the tail
Tail outline and joining:
* sc in next 7 sts. sc in between the 2 shells.
Ch 1, sc around the row below (in between the same 2 shells you just did, only on row 7).
Ch 1, sc around row 6.
Ch 1, sc around row 5 (there are 2 skipped sts available, 1 sc into the closest one, ch 1, then sc into the other).
Ch 1, sc around row 6.
Ch 1, sc around row 7.
Ch 1, sc around row 8.

Facial Assembly: Do this before joining the front and back piece.
1. Cut 2 pcs. of 3/4″ diameter of white felts, 2pcs. of 1/2″ diameter of black felts, 3/4″ red beak and 1 1/4″ long snood.
2. Sew on the front of the turkey with respective color thread.

Get ready some fall color yarns, for example shades of brown, orange, yellow, grey and white.
Cut eyes, beak and snood from felt.

Plan the color combo and arrangement or refer to above photos for suggestion.
Slip knot on crochet hook, crochet 4 chains.
Follow crochet pattern above (rnd 1 to rnd 4) to make the turkey body.
Begin to crochet turkey tail by making 10 sets of “2dc,ch1,2dc” for row 1.
Always begin each row from right hand side with right side facing you.

 Follow crochet pattern above (row 1 to row 4) to make the turkey tail.

 Once the front is done, weave in all ends to neaten.
Sew facial of turkey to the body.

Crochet the back with single color yarn by repeating the front pattern, except that you can choose to either follow exactly, or, turn your piece as you work on the the tail.
Make a 10 chains hook loop at the middle of the last row.

Place the front piece on top of the back piece, with wrong side facing each other. Line up edges.
Crochet along the edge towards the body. Stitches must go through both layers.
Crochet feet.
Crochet towards the turkey tail.

Single crochet 7 stitches on the shell and 1 stitch between the 2 shells.

Crochet 1 chain, then single crochet again between 2 shell on the following row.

Repeat the stitches until you get to the bottom.

Single crochet in the first skip stitches of round 5, chain 1, single crochet on the second skip stitch.
Go up to the top again.

Continue to crochet by repeating the stitches for the rest of the tail details.

 Slip stitch and fasten off the yarn when you reach the first stitch of the joining process.
Weave in the end.
Done!

Crochet Turkey Coasters Ornaments

Friday, October 12, 2012

Frost (and stew) on the Pumpkin

Fall is definitely here and there's nothing better than the aroma of a crock pot of stew to greet you in the morning! Almost better than coffee...almost.
Today our new relatives are coming over for Supper, and I'm making one of Chrystal's popular dishes, Pumpkin Pie Stew.

The recipe is easy:

2 lbs of stew meat, floured and seasoned.
1 McCormack's bag'o stew packet (save the bag for the veggie peelings)
Add whatever you normally put in stew. I used carrots, potatoes, onion, green beans and 1 small can stewed tomatoes. Brown meat in skillet, add crushed garlic and turn off heat. Add seasoning packet, 1 1/2 cups water and stir to deglaze the skillet. Toss in crockpot and cook on low overnight in a large crockpot.
Next day:
I had to add a can of beef broth, or you can add water to make more stew broth.
Preheat oven to 325• and prepare brownie mix. While those are baking, prepare 4 pie pumpkins by taking a large plastic cup, and score around the rim of cup to remove tops. Gut the pumpkins, clearing out all the seeds with your hands. Place the pumpkins on a sturdy cookie sheet for stability.


20121011-080334.jpg
For those Divas who don't want to mess up their nails, you can use my special Candy Ass Pumpkin De-Gutting Tool for cleaning out the innards.


20121011-080445.jpg
Set the seeds aside for later roasting.


20121011-080513.jpg
When the brownies are done, the pumpkins should be cleaned out, amd filled sith juicy stew. replace the tops and pop into the oven. Bake at 325• for approximately 1.5- 2.5 hours or until pumpkins are done.


20121011-081833.jpg

20121011-081841.jpg
I only had room for 3 pumpkins, so the 4th was relegated back to the crock pot.


20121011-081926.jpg
Note to Self: next time, don't forget the BAY LEAFS!

20121011-082035.jpg
Peeps named himself yesterday, with one simple sound, "peep!"

Peeps says Good Morning, Punkinhead Peeps!


20121011-082201.jpg

Saturday, October 6, 2012

Remains of the day~a day full of Fall


Today turned out to be better than expected! I was so excited to be able to go to the Tall Grass Farm Fall Fiber Jubilee today. I joined up with Debbie, the owner of Studio S Fiber Arts and we rode together up the road and 'round the bend to the farm. Master shearer David Kier was on hand to demonstrate his talents!

The other sheep in the pens watched and waited their turn.
There were vendors from around the area on hand to demonstrate spinning, basketry, and cooking! The smells were incredible!!! The chill in the air kept us moving; 43 for a high today, it definitely is feeling like Fall! Igor needs his Fall jacket~
  20121006-163244.jpg
 When we got back to the studio, I hung around and enjoyed a cup of coffee and pumpkin spice donut holes, while watching people come into the shop in droves. Eleanor and I chatted while Debbie rang up sale after sale. Finally, I got a break and scored some bamboo circulars for my tool stash. I was getting ready to leave when Marcy pulled me aside. She said, "I have something for you!", and promptly whipped out of her knitting bag, a skein of Wollmeise yarn in the most beautiful color of Nightshade Blue I've ever seen! I can't wait to knit this up-a pair of gloves, maybe? 20121006-163715.jpg I gathered up my things and headed home to Hubby, a head full of Fall knitting ideas, and heart full of feel-good. Sharing my morning with hubs, I showed videos and pictures of the events. He told me he had just watched an episode on TV, someone shearing sheep! As we sat and talked, he brought up Spaz, saying that he really missed the little bugger. Then he surprised me by suggesting we get another one, and asked what I thougth. Yes! I said, emphatically! We should get it before it gets too cold, and recalled how we got Spaz in October the year he came into our home. We even designated Halloween as Spaz' birthday, easy to remember~ I ran upstairs, got Spaz' cage back out of the closet, and set it out in its old familiar spot in the dining room table, door open, ready for its newest family member. Heart full of hope, I had Hub load Igor in the rear, then he got in the passenger side, letting me drive, and off we rode to the pet store. As luck would have it, they had a special on the 'keets, and quite a number to choose from. Hubs eyed the green ones for a few, then told me to pick one out and wandered off toward the checkout lane. I studied each one, pointing out a little guy that looked extra spunky, and turned to ask Hubby what were his thoughts. To my dismay, I saw him leaned against the cash register lane, looking rather unsteady on his feet. It was clearly evident he was not having a good day, and was very close to falling. So, with heavy heart, I walked him back out to the car, and we went home, without a 'keet.
Back home, upstairs in the Yarn cave, while Hubs is napping, I am blogging and just received yet another surprise in the mail, from my friend Lindy, in Australia. Angora rabbit yarn!!! 20121006-165654.jpg I'm working on Nat's Bats Shawl, scored some gorgeous Lavender Sparklies yarn for the border. It's going to be to-dye for! 20121006-171043.jpg Some-bunny is looking out for me, and I'm very grateful for my friends and family. At the end of the day, it's all just stuff; it's the joy of friends looking out for each other, that is all that matters. Hope you are having a day full of gratitude and joy, as well. I was happy to share mine with you! 0:)

Wednesday, July 25, 2012

Frilly Fun Scarf

I've got hooked on a new project. I've ventured into making the Frilly Scarf, after a local yarn shop owner showed me a skein I couldn't live without. I didn't treatise how many yarns there were out there, or how long this has been a fashion trend; once again I'm "out of the loop"m but now I'm back in!
She showed me how to cast on and knit the netting, and off I went on my new adventure!
This fun and bright webbed ribbon yarn is a quick and easy Tv project, which can be knit in a couple episodes of Bones!

This PDF file shows steps for knitting with Marina.

This YouTube video demonstrates knitting with Marina.

This same technique can be used for the Schachenmayr yarn I have chosen.

20120725-081845.jpg

This is my first Frilly Scarf in an Hour

20120725-081934.jpg
I'm working on another for my Riders Edge Instructor, Kellie, to match her bike in Sedona Orange

20120725-082040.jpg
I bought two balls because I want one and the dark maroon will match Stella!